


No one ever guesses my one bedroom used to be a studio apartment

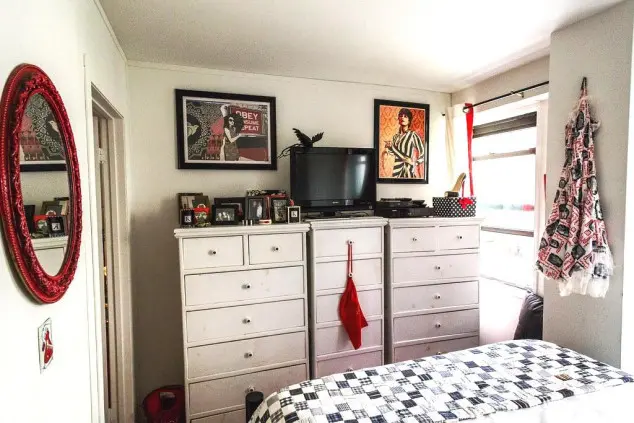
The author wallpapered the side of the temporary wall that's in her bedroom.
Kelly Kreth
I never thought I could live in a studio apartment, because, frankly, I have too much stuff. And the thought of having only one big, square living area was a huge turnoff. Did I really want to see all my stuff, all of the time?
So when circumstances forced me to move out of my two-bedroom apartment, where I had turned my entire second bedroom into a giant closet and dressing room, I initially didn’t even consider living in a studio.
Then I saw an L-shaped alcove studio and realized studios had more flexibility than I thought. I was shown a similar alcove studio—this one was rent-stabilized in a luxury doorman building—and I knew I could make that one work for me with some creativity, but there were some major bumps along the way (more on that in a moment).
First, make a floor plan
The first step after making sure the building was okay with putting up walls and converting to a one bedroom (they were!) and signing the lease, was to create floor plans for my 480-square-foot apartment. I realized I could put up two (bisecting) walls instead of just one, to create a room with more space and an actual door.
[Editor's Note: Altering the layout of your apartment requires a permit from the Department of Buildings, and to get a permit, you need to hire a professional engineer or registered architect to submit plans to the DOB for approval, and use a registered and insured contractor to perform the work. Illegally constructed walls can create unsafe conditions, even fire hazards.]
Where to put the wall
The tricky part was making sure to bisect the wall of windows at exactly at the right point so they’d all still be accessible and easy to open, and allow a HVAC unit in each room.
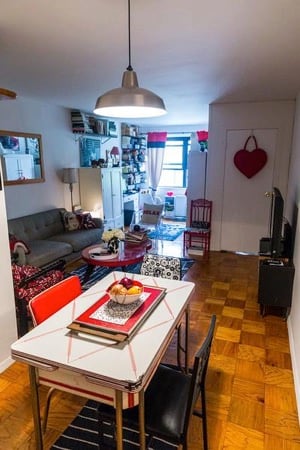
By rendering the apartment layout this way, I not only got a queen-sized real bedroom and also an office space on the other side of the wall that’s roughly 7.5 feet by 7.75 feet. There is light and air in each area and a full living room.
Then I went to the unit, tape measure in hand, and got exact measurements so I could furnish the place.

Rooms with distinct purposes
The key, for me, to being able to fit all my stuff into a studio was to be able to create distinct rooms out of a bigger open space. I now had a bedroom, office, living room, and kitchen. It certainly didn’t hurt that the apartment came with ample closet space—a total of four, and one is a walk-in.
Once I had my plans all mapped out, I researched temp wall places in New York City. I checked out their wall offerings, trying to decide if I wanted ones with shelves, openings to allow light through or just standard flat, solid walls. I picked a company and explained what I needed. I opted for the simplest and cheapest wall design. I wanted the apartment to look like a real one bedroom.
While most need to take the wall down when they move out, I knew I’d be living in this apartment for years—possibly the rest of my life.
One of the things that I think make these walls look “fake” is the gap between the top of the wall and the ceiling, something that many buildings require. My full-size wall is grandfathered in (thank God) but as of this year, my building now requires a 12-inch gap between the top of wall and the ceiling. Some convertible walls attach to a track on the floor and ceiling so they can be easily dismantled, a look I did not want.

Floors so shiny I could see myself
Timing was also an issue: The apartment had just been painted and the floors had just been redone, and I knew I needed the walls put up in two days after the polyurethane was fully dried. And I needed to leave my old apartment to avoid paying an extra month of rent there.
The floors were done perfectly and all went off without a hitch. The guy who did them verified they were indeed dry and even sent me a picture of them. They were so shiny I could see myself.
The wall installers came, and I stayed with them for two hours explaining exactly what I wanted, showing them drawings and printouts. When I was sure they understood what I wanted, I left to go home to finish packing.

Installing the wall
That night, upon returning, the walls were installed but the job was a total disaster. They put the wall so close to the window the window couldn’t be opened—even though I was very specific about where I wanted the walls and door placed. Everything was crooked and there were gaps.
The paint job was streaky with dried drips of paint that stuck out, and the metal and seams of the wall showed through. Worst of all, it appeared there was a film of white milky paint over the entire floor.
This made no sense to me. Why would the wall guys use a dirty mop all over the floor, when the wall was just in one corner? Apparently they did not put down a throw cloth to protect the floors. I realized I shouldn’t have given into my fear of being thought of as a micro-manager, and I should not have left. Perhaps I also should have dove into Yelp reviews of this firm more than my cursory look.
I was livid and called the wall company’s account manager. He came by, but it was dark at this point. He saw a few streaks on the floor and assured me they’d come back the following day and clean it all up. And they did, sort of.
This time I stayed and watched them put down drop cloths on the floor and made sure there would be no mopping with a dirty mop. I implored them to use the Swiffers I made readily available as well.
But it turns out the damage was done. While they did fix all the baseboards and borders, and repaint the walls and door they had installed, a milky white sheen remained on the floor.
Re-doing the work
I tried to mop up the streaked milky film myself. After an hour of mopping, it was still there.Then I scrubbed and even used my nails and it would not come up. It had seeped into the new poly. My brand new floors were totally ruined! I was set to move in the following day and the movers were all ready to go. But I had to rearrange everything and rehire the floor guy to re-sand and re-polish the floors and then wait the obligatory two extra days for them fully dry before I could move.
I called the temp wall company and they refused to pay for their snafu! I also had to alert my management company because I wanted them to understand I should not be held responsible for the floors—the wall guys should.
When I finally moved in, I set about decorating in a way that made the new setup look like an actual one bedroom. I wallpapered one side to match the rest of the wallpaper in my bedroom. I hung pictures and put my biggest furniture against the temp wall to hide it so its differences wouldn’t be so glaring. I then set up the office area on the other side and again hung pictures on the wall and pushed furniture against it.

The result is quite remarkable. No one—even those who live and work in the building—ever guess the apartment was originally a studio.
If I had to do it again, I would hire a different wall company and stay there the whole time watching them do the work to my specs—even if it would make me seem like a neurotic micro-manager. I would stay with them the entire time making sure they covered every inch of flooring with a drop cloth and didn’t clean up with a paint-filled mop. Live and learn.
You Might Also Like


