


NYC Renovation Chronicles: Voila! Popcorn ceilings begone
Once I had decided I couldn't stand seeing the popcorn ceiling anymore, the popcorn was all I saw. I'd walk into the bedroom and the first thing I'd do is look up and hate those tiny white globules overhead. I really wanted to get going on Operation Ceiling Coverup.
My tile samples couldn't come fast enough.
Usually, I have a pretty good idea of what I’m looking for before getting samples. After all, they do (usually) cost money, so I like to limit the samples I get to the final three options (of paint, fabric, whatever), predicting that I will be happy with one of them.
When the samples from the ceiling tile company arrived, however, I wasn’t happy with any of them. I knew right away I didn’t want any of them up on my ceiling. I also knew right away I was wrong about my assumption about the patterns.

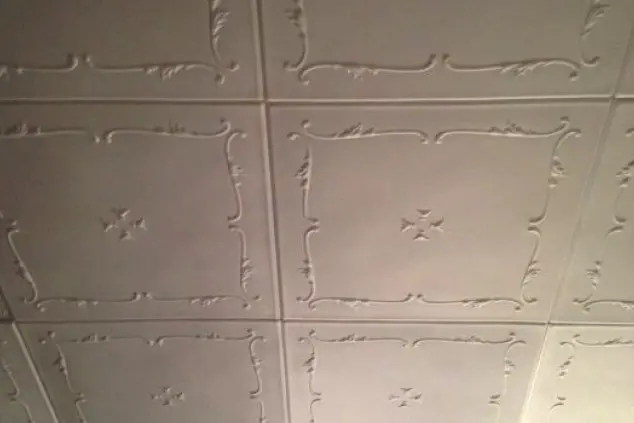
At first, Mayra thought this straight-line look, pictured above, would be right.
Before seeing the samples, I assumed straight lines on the tile (above) were the best choice. But the straight lines were too rigid and made the ceiling look lower somehow. Maybe it would have been appropriate for a formal living room-- but it did not make for a relaxing bedroom ceiling.
None of the other samples presented a solution either. For one sample, I chose a (what I thought was) a “softer” pattern (below) with no straight lines. But the effect was dizzying, and the repeated blocks on the pattern felt oppressive.

Mayra found this this pattern dizzying, and decided to nix it.
What to do? I looked at their selection online again. I spotted a tile I had immediately dismissed before because it had flowery pattern. In fact, it was called “spring buds” (pictured below) which immediately turned me off. (Saccharine. Ugh!)
But upon second look, I suddenly thought it was perfect. The tile looked “sparse” compared to the others, and the pattern lines were soft and slim. I calculated the number of tiles I needed using their project calculator and placed my order. For 70 2’X2’ tiles I paid $280 dollars.
(Tip: whenever a vendor accepts coupons online, immediately go to RetailMeNot.com. The site collects coupons and discount codes from all over the internet. Copy the code and you can apply it at your vendor's check-out page It’s how I got free shipping on this order!)

The winner--one that Mayra had originally decided against.
So that was that. My un-sampled ceiling tile was ordered. Five days (and one FedEx tracking mix up) later, we had our tile.
“Prep”-- a four letter word.
As recounted in my last post, applying this lightweight polystyrene product seemed like the easiest option in dealing with our hideous popcorn ceiling. This project was supposed to be an affordable, no mess, and above all, quick solution.
After watching videos and reading accounts online by people who had undertaken this endeavor, using this product, I was looking forward to an easy-peasy installation. Done in one afternoon! That’s what they said online. And as far are DIY home improvements go, this was, indeed, an easy- peasy one. The accounts online were not wrong. Installation of the tiles only took a few hours. Our bedroom is approximately 14’ x 12’ and sticking tiles only took one person about four hours, with lots of breaks and while watching football.
But the prep that will get you every time.
Before we could even think about sticking one tile up there, we first had to clear the room. That would be enough to zap anybody of their energy and enthusiasm for any DIY project. We removed chairs, chests, and boxes ,but where were we supposed to put the bed? We put the bed on furniture sliders and just maneuvered it around the room as needed. We also covered the bed with a sheet, paper sheets, and a large piece of ply wood we had left over from another project to create an instant work table.
Next came the measuring. As per the helpful hints on Decorative Ceiling Tiles’ website we used a chalk line to mark out the intersecting center lines of the room. First, we had to measure the length and mark the center point of each wall. Spanning a tape measure across a 14 feet of ceiling is difficult enough with two people and only one ladder, so I really don’t see how this is a “one person job” as some claim online, but moving on…
After marking out the center points, we filled the chalk line with blue chalk powder and pulled it across the ceiling.
Warning: pulling string which is coated in blue chalk powder across the room will result in blue chalk powder all across the room. Once we finally managed to pull the chalk line taut against the ceiling (again, difficult when one person only has a step stool to stand on - I mean, who has two ladders?) we snapped the line and had a perfectly straight, blue line across. We did that one more time across the other way, et voila: the ceiling had a grid dividing it up into four smaller squares. This made the project more manageable since it’s easier to oversee the work within a smaller frame, and obviously it’s good for making sure you are laying the tiles straight.
All in all, prep took us about two exhausting hours. After that, the rest of the project went fairly smoothly and pretty much like they showed in the videos. We used Acryl Pro as our adhesive, and when we ran out of that (we slightly underestimated how much we’d need), we used Power Grab, which has become a staple of our DIY pantry. Both adhesives were mentioned on the Decorative Ceiling Tiles website, and they both worked equally well.
So, there the tiles are, securely stuck to the ceiling in neat, smooth rows. We haven't painted the ceiling yet -- I'll need to narrow down our paint selection first and then, of course, test samples before deciding on the colors of the bedroom! But the tile is a plain white, with just a little bit of sheen and it has somehow blended into the background already. I thought it would take a while to get used to this new feature, but actually I've even stopped looking up at the ceiling everytime I enter the room.

BEFORE: Mayra's much-maligned popcorn ceiling.

HALFWAY THERE: The ceiling, midway through the DIY project.

AFTER: Mayra transforms her ugly popcorn ceiling with self-adhesive decorative ceiling tiles.
NYC Renovation Chronicles is a bi-weekly column focused (obviously) on renovation, NYC style. Helmed in the past by an architect, a kitchen and bath designer, and a general contractor, the column's new steward is co-op renovator, real estate porn addict and Harlem resident Mayra David. She'll focus on what it's like to DIY or HSI (= Hire Someone Instead) in NYC.
Related posts:
NYC Renovation Chronicles: 3 DIY projects worth doing yourself
10 things I learned during my year-long renovation
5 things you may live to regret doing in your own apartment
10 first-time renovation mistakes even New Yorkers make
Want to renovate? Here's how to get the money
Here's why you may be overpaying for your NYC renovation
NYC Renovation Questions: What should I ask when checking my contractor's references?
Can't afford/find a two bedroom apartment? The right one-bedroom just might work
NYC Renovation Questions: What should I know about converting a tub to a walk-in shower?
Here's why you may be overpaying for your NYC renovation
NYC: 5 ways to save on your bathroom renovation


